Best Bike Lights for Mountain Biking (2026 Guide)
Introduction
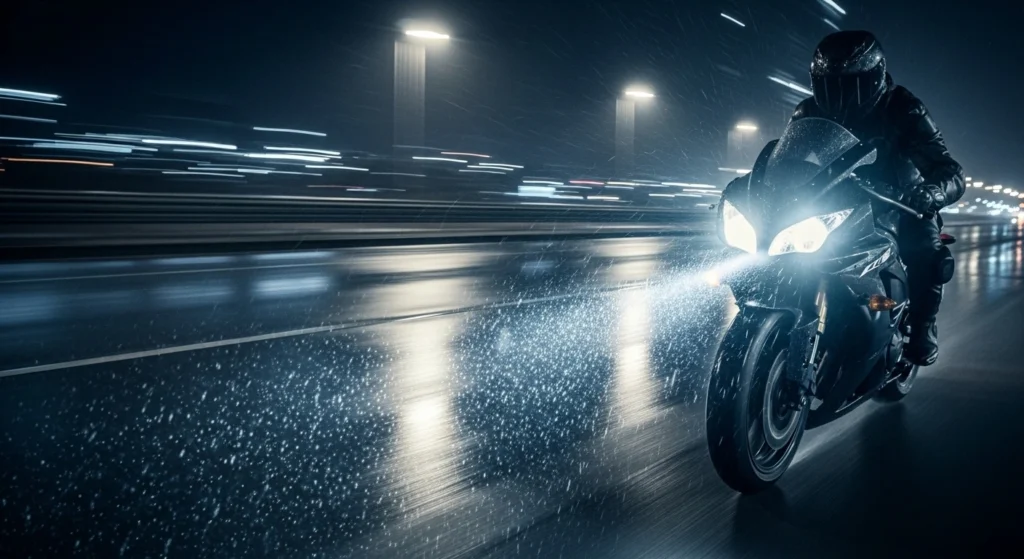
Bike lights, mountain biking at night is one of the most thrilling yet challenging riding experiences. The trails are darker, the terrain becomes unpredictable, and your reaction time depends heavily on one critical factor — your lighting system. Choosing the right bike lights for mountain biking isn’t just about visibility; it’s about safety, control, and confidence.
Unlike road cycling, where street lights may assist you, mountain biking demands powerful, high-performance lighting capable of handling rough terrain, sharp turns, and sudden obstacles. A poor-quality light can turn an exciting ride into a dangerous situation.
In this comprehensive 2026 guide, you’ll discover:
- The best MTB lights available today
- How many lumens do you actually need
- Helmet vs handlebar light strategies
- Expert tips for safer night riding
- Common mistakes most riders make
Whether you’re a beginner or an experienced trail rider, this guide will help you make a smart, informed decision.
What Is the Best Bike Light for Mountain Biking? (Quick Answer)
The best bike light for mountain lights mountain biking in 2026 is a high-lumen (2000–8000 lumens) front light with a wide beam pattern, combined with a helmet-mounted light for directional visibility.
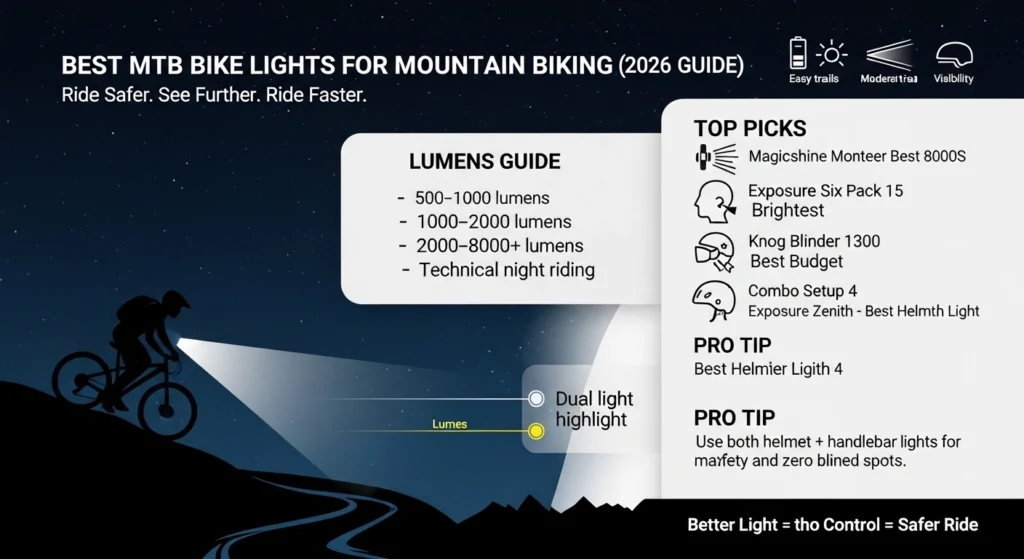
Top Pick: Magicshine Monteer 8000S
- Extremely powerful output (up to 8000 lumens)
- Wide flood beam for full trail coverage
- Ideal for aggressive night riding and downhill trails
Quick Recommendation by Use Case:
| Use Case | Best Choice |
| Overall Performance | Magicshine Monteer 8000S |
| Maximum Brightness | Exposure Six Pack 15 |
| Budget Riders | Knog Blinder 1300 |
| Helmet Light | Exposure Zenith 4 |
| Combo Setup | Magicshine HORI1300S + SEEMEE 150 |
Why Mountain Biking Needs Specialized Lights
Mountain biking at night is fundamentally different from road cycling. Here’s why:
1. No Ambient Lighting
Unlike urban roads, trails are completely dark. You rely 100% on your bike lights.
2. Technical Terrain
Rocks, roots, drops, and uneven surfaces require instant visibility.
3. Speed + Reaction Time
At higher speeds, your brain needs more light to process terrain changes.
4. Depth Perception Challenges
Without proper lighting, shadows distort your perception.
Conclusion: A weak light doesn’t just reduce visibility—it significantly increases risk.
Types of MTB Lights (Explained Simply)
Understanding different light types is essential for building an effective setup.
Handlebar Lights
- Mounted on handlebars
- Provide wide beam coverage
- Illuminate the entire trail ahead
Best for:
- Fast descents
- Wide visibility
Limitation:
- Doesn’t follow your head movement
Helmet Lights
- Mounted on a helmet
- Moves with your vision
Best for:
- Cornering
- Spotting obstacles early
Limitation:
- Narrow beam
Combo Systems (Best Setup)
Using both lights together is the gold standard.
Why it works:
- Eliminates shadows
- Improves depth perception
- Enhances corner visibility
Real-world rider insight:
Most experienced MTB riders agree — dual-light setups dramatically boost confidence and control
How Many Lumens Do You Need for MTB?
Lumens measure brightness, but more isn’t always better without proper beam design.
Recommended Lumen Levels:
| Riding Type | Lumens Needed |
| Easy Trails | 500–1000 lumens |
| Moderate Trails | 1000–2000 lumens |
| Technical / Fast Riding | 2000–8000+ lumens |
Expert Recommendation:
At least 1500 lumens minimum for safe night riding.
Important Note:
Beam pattern matters just as much as lumens.
- Flood beam = wide visibility
- Spot beam = long-distance focus
Best setup = combination of both
Best Mountain Bike Lights (Tested & Ranked)
Here are the top-performing MTB lights in 2026, based on real-world performance, durability, and rider feedback.
Best Overall: Magicshine Monteer 8000S
Overview:
A powerhouse designed for serious mountain bikers who demand maximum visibility.
Key Features:
- Up to 8000 lumens
- Ultra-wide beam pattern
- Long battery life
- Durable build
Best For:
- Night trail riding
- Downhill Riding
- Professional riders
Estimated Price: $300–$400
Brightest: Exposure Six Pack 15
Overview:
Premium performance with intelligent brightness adjustment.
Key Features:
- ~6000 lumens
- Auto-adjust brightness
- Premium build quality
Best For:
- Advanced riders
- High-speed trails
Estimated Price: $400–$500
Best Budget: Knog Blinder 1300
Overview:
Affordable yet powerful option for beginners.
Key Features:
- 1300 lumens
- Compact design
- USB rechargeable
Best For:
- Casual night riding
- Entry-level MTB riders
Estimated Price: $80–$120
Best Helmet Light: Exposure Zenith 4
Overview:
Lightweight and powerful helmet-mounted light.
Key Features:
- Focused beam
- Lightweight design
- Long runtime
Best For:
- Directional lighting
- Cornering visibility
Best Value Combo: Magicshine HORI1300S + SEEMEE 150
Overview:
Balanced performance at a reasonable price.
Key Features:
- Front + rear system
- Good brightness balance
- Affordable combo
Comparison Table (Top MTB Lights)
| Model | Lumens | Type | Battery | Best For |
| Magicshine Monteer 8000S | 8000 | Handlebar | External | Hardcore riders |
| Exposure Six Pack 15 | 6000 | Handlebar | Internal | Premium performance |
| Knog Blinder 1300 | 1300 | Handlebar | USB | Budget riders |
| Exposure Zenith 4 | 2000 | Helmet | Internal | Directional light |
| Magicshine Combo | 1300+ | Combo | USB | Value seekers |
Handlebar vs Helmet Lights (Which Is Better?)
| Feature | Handlebar Light | Helmet Light |
| Coverage | Wide | Focused |
| Cornering | Limited | Excellent |
| Speed Riding | Excellent | Supportive |
| Depth Perception | Moderate | High |
Final Answer:
Use both together for the best results.
How to Choose the Best MTB Light
Choosing the right light depends on your riding style and budget.
1. Lumens
- More lumens = better visibility
- Minimum recommended: 1500 lumens
2. Beam Pattern
Look for:
- Wide flood beam (primary)
- Focused spot beam (secondary)
3. Battery Life
- Minimum: 1.5–3 hours
- Consider an external battery for long rides
4. Mount Stability
- Must handle rough terrain
- Avoid shaky mounts
5. Waterproof Rating
- Look for IPX4 or higher
- Essential for mud and rain
Pro Tips for Night Riding (Expert Insights)
- Use a dual-light setup (helmet + bar)
- Angle lights slightly downward
- Carry a backup battery
- Reduce glare to avoid blinding others
- Practice on familiar trails first
Common Mistakes to Avoid
- Choosing based only on lumens
- Using road bike lights for MTB
- Ignoring the beam pattern
- Riding with a single light
- Not checking the battery before rides
Pros & Cons of MTB Lights
Pros
- Improves visibility and safety
- Enhances riding confidence
- Allows night riding flexibility
- Better terrain awareness
Cons
- High-quality lights are expensive
- Battery management required
- Poor setups can create shadows
FAQs
A: But only for slow or beginner-level trails. For serious riding, 1500+ lumens is recommended.
A: Premium lights off
Better beam quality
Longer battery life
Higher durability
A: Not always, but it’s useful for:
Group rides
Trail crossings
A: Both are essential. A dual-light setup provides maximum visibility.
A: At least 1.5 to 3 hours for standard rides.
A: Not recommended. MTB requires stronger, wider beam lights.
Final Verdict
If you’re serious about mountain biking at night, investing in the right lighting system is non-negotiable.
Key Takeaways:
- Go for 2000+ lumens minimum
- Always use a dual-light setup
- Focus on beam quality over raw brightness
Bottom Line:
A high-quality MTB light isn’t just an accessory—it’s essential safety gear that can completely transform your riding experience.